Animal Crackers: The Party
With the invitations mailed and the cake designed I began to look for affordable favors, fun activities, creative food options and easy decorations. Here is what I came up with:
The Decorations: Keeping in mind that I was playing off all of Avery's favorites things we made sure to tie that theme in with the decor.
1) A STREAMER TENT: Due to the lack of time and help my husband and I had for this party, I did not get the amount of streamers I had envisioned for my "Streamer Tent", but all things considered, it turned out cute. My husband took alternating colors of streamers, that coordinated with the colors we were using, and streamed them from the chandelier in the dining room to the edges of the room all the way around. My vision was wall to wall coverage of streamers, but the time did not allow for it. Maybe you could tackle that one?
2) BALLOONS & FLOWERS: What is a Birthday party without balloons? Avery LOVED balloons at the time. A large bunch of multi-colored balloons to coordinate with the parties colors was just the right touch in the kitchen to make it look festive without going to a lot of trouble. I also lucked upon a gaudy $5 bouquet of daisies, at the grocery store, dyed bright colors. They were amazingly perfect for this party and added a wonderful touch to the food table.
3) VINTAGE ABC CARDS: We lined the dining room chair rail with all her vintage ABC flash cards, which made for cute, quick and easy decor.
4) KIDS TABLE: We borrowed a child-sized banquet table and chairs from church, which fit perfectly in the dining room, while still allowing room for toys and parents. We covered the table with a long roll of brown craft paper and placed stainless steel buckets of various shapes and sizes on the table filled with crayons and chalk for drawing. The kids had a blast coloring and so did the parents. The table was quite artsy by the time the party was over. We topped the table off with large round multi-colored confetti that gave the table a colorful and festive look and mimicked the look of the invitations.
5) THE FOOD TABLE: The food table was covered with a small, simple, white table cloth turned sideways and covered with the same confetti that the kids table had been covered with. I used various pieces from my dishes that were colorful or made of various materials to give the table an eclectic look. To highlight the cake at the center I placed the cake plate on an upturned green planter.
The Food: We served all of Avery's favorite foods at the party which took place over lunch. All of the foods we chose to serve were easy to make and quick as it was just my husband and I preparing the food for the party. Here's the menu:
• Peanut butter & jelly Quarters
• Ham and cheese quarters
• Miniature pigs-in-blankets
• Cheese & crackers
• Relish tray with dip
• Fruit salad: Watermelon balls, cantaloupe balls & purple and green grapes
• Cheddar bunnies
• M&M's
• Animal crackers (of course!)
• Large pitcher of lemonade
The Activities: There is NO way to organize toddlers and play a game. I've tried it. Please tell me if you have - I would love to know what you did! That being said we opted for free-play at this party in a tight space and it worked out quite well. Here is what we did:
1) PLAY KITCHEN: At this point in time our dining room was serving as a temporary play-room, so we were able to rearrange things and leave her play kitchen in the dining room for free-play. The kids loved it!
2) TENT & TUNNELS: We have a pop-up play tent and tunnels with balls that we placed all along one side of the room and the kids had a "ball" running through them.
3) WAGON: You don't have to go anywhere to have fun in a wagon! We placed our new wagon by the window and the kids loved climbing in and sitting together.
3) CHALK BOARD: In addition to coloring on the table we had a small chalkboard and a tin of chalk set up for drawing.
The Favors: I usually like to go all out with my favors, but being pregnant at this time, I opted for affordable, fun and easy. Each child got a $1 tub of sidewalk chalk and a box of the original Barnum's animal crackers I loved as a child. You can't get a more perfect or vintage fit than Barnum's animal crackers for an "Animal Crackers" party.
Thursday, December 10, 2009
Animal Crackers "The Cake" — Cupcake Dreams & Candle Wishes: Part II
Animal Crackers: The Cake
Playing off of the invitations and her love of carousels, I envisioned a tall round cake with two tiers, three layers each, in a creamy yellow with colorful frosting polka dots and topped with a miniature carousel made of animal crackers.
Being 3 months pregnant at the time I looked for ways to save time on this cake monstrosity, by using cake mixes, jams, store bought frosting and ribbon. Even so, I crawled into bed at 3 a.m. the night before the party. Crazy momma! What we won't do for our children.
The Cake Tiers: Each tier of the cake was 3 layers, with each layer being a different kind of cake. I chose a confetti white cake mix, a lemon yellow cake mix, and a decadent chocolate cake mix for the three layers. Layering the cake in the following order for each tier; chocolate, confetti white, and lemon yellow; I placed raspberry jam between the chocolate and the confetti white cakes and then orange marmalade between the confetti and the lemon yellow cakes. This combination of cakes and jams may sound bizarre, but it was surprisingly tasty!
Tip: Make sure to use dowel rods which you can find at any cake or craft store for stability. Place them down in the center of the bottom cake. It will keep a cake this tall from sliding or falling.
The Frosting: For the frosting I used a store-bought cream cheese frosting that I had planned on tinting a pale yellow. As luck would have it, it turned out to be the perfect color straight from the can. Make sure you have 4-6 cans of frosting to frost a cake like this. The keys to eliminating the crumbs from your frosting is to spread it on thick in long sweeping strokes and if there is time to do a crumb coat I highly suggest it. A crumb coat is a first layer of frosting that is allowed to dry or set in the fridge overnight. This ensures that the second coat will be virtually crumb free. Sadly, I did not have time for a crumb coat on this cake and it was not crumb free. Fortunately, two-year-olds are forgiving little people. Spreading the frosting on thick with the second coat will ensure a more even surface and will prevent your spatula from sticking to the cake or the crumb coat and pulling it up.
Now, comes the hardest part and that is smoothing the frosting out. I have yet to master this skill, but I hope one day to perfect it. I have found that longer sweeping strokes with the full-length of the spatula smooth better than shorter, choppier strokes with only the end of the spatula pressing the frosting. Another very useful tip I learned in 4-H years ago, was to dip your spatula in a cold glass of water, gently shake the excess water off and then smooth over rough spots. It really helps!
The Decorations: As a last minute stroke of, what I thought was genius, I decided to use ribbon on the bottom half of the cake for my stripes rather than frosting. It saves you from having to get the stripes perfectly even, smooth and spaced correctly with a piping bag, which can be very difficult. I was also running low on frosting and wanted to have enough for the polka-dots. I alternated colored ribbon stripes all the way around the entire bottom half of the cake. I measured out the ribbons, cut them all at the same time and then tacked them on with frosting. To cover the uneven spots at the top and bottom, where the ribbons ended, I piped coordinating polka-dots in alternating colors around the base of the top and bottom tiers. This technique saved oodles of time.
I then wrote Avery's name on the top tier at the front in a font similar to what I had used on her invitations. Being a graphic designer and someone who LOVES fonts this is fairly easy for me to freehand. If it's not easy for you, try printing out the letters in your font of choice to the exact size you want them. Then cut them out and carefully arrange them on the cake. Take a toothpick and trace around them in the frosting and then peel the paper letters off the cake. Pipe the letters with alternating colors.
After piping in the name, I placed medium and large polka-dots in the various colors all over the top tier of the cake and piped a very small border of tiny dots in alternating colors all the way around the edge of the cake top. Mine were somewhat sloppy as I was getting very tired at that point!
The Carousel: To make the carousel I took a small hand-held flag that had a finial at its top and carefully removed the flag and staples. Using the pole as the center of my carousel, I placed it down in the center of the top cake to the height I preferred. I then took 5 colored toothpicks and stuck them down in the outer edges of the cake top at even intervals. I took the same colored ribbons I had used on the cake, measured them out and then using a thin strip of teal-colored duck tape, I taped them all to the center pole at the very top, just below the finial by winding the tape around the top of the pole about 3 times to secure the ribbon (Please make sure that the ribbon is spaced around the pole evenly and not taped down in the same spot).
I set up 4 or 5 animal crackers marching in a circle around the pole as if on a carousel and then
strung the ribbon out toward the toothpicks (one ribbon per toothpick), to make my tented carousel. I poked the ribbon through the top of each toothpick to hold it in place. (Make sure there is some slack in the ribbon before you poke the tip of the toothpick through it. You want the ribbon to swag a little between the flag pole and the tooth pick to resemble a tent. Allow about 4" of ribbon to hang down from the other side of the toothpick.) Now you have a miniature carousel. For extra measure stick a parade of animal crackers somewhere around the base of the cake.
Tuesday, December 8, 2009
Animal Crackers "The Invitation" — Cupcake Dreams & Candle Wishes: Part II
Animal Crackers: The Invitation
For my daughter's second birthday, I wasn't sure what to do. Her interests were quite unusual for a two-year old. Musicals. Mary Poppins and The Sound of Music were her favorite movies, with Oklahoma running a close third. We were routinely singing "My Favorite Things" and "Doe a Deer" at bedtime. She watched the carousel scene in Mary Poppins over and over and loved listening to a song we had on CD about carousels. Reciting ABC's and 123's were a daily practice, she was taken with the moon and adored cooking with us at night, so we chose to celebrate the eclectic mix of all her favorite things she loved and was doing at the age of two.
Inspired visually by a vintage set of ABC's flash cards Avery and her father played with every day and a song I couldn't get out of my head "Animal Crackers in my soup..." from an old Shirley Temple movie, I came up with a vintage look. Using eclectic imagery and whimsical colors these vintage invitations, paired with red-orange polka-dotted envelopes from Envelopemall.com, were fun and unusual.
If you are interested in ordering a customized version these invitations from The Blu Sash, please e-mail us donia@theblusash.com or give us a call — 859.271.6934.
Thursday, December 3, 2009
Let them eat cake
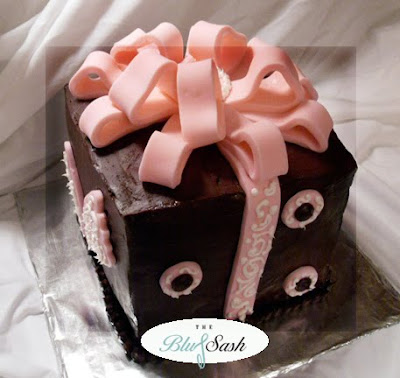
I love making cakes. I am passionate about cakes, but I have to say, I will leave the cake making to the professionals. It was way too stressful, but it was also a whole lot of fun! If my daughter's cake falls in or that glop of chocolate frosting falls somewhere it's not supposed to be — oh well — I will do it differently next time. If you trip and drop the purchased baby shower cake on the way to the door — that's a whole new ball game.
I was much relieved when I dropped off the package at it's final destination. Everyone was pleased and so was I!
Although The Blu Sash will not be in the business of baking your cake, we do offer cake design services and have local vendors we work with to create the perfect cake for your occasion. Let us coordinate with those lovely invitations and party favors we look forward to designing for you!
Here's to having your cake and eating it too!
Giving Thanks
Today I am giving thanks! I am thankful for the wonderful time I had with my family last week over turkey, mashed turnips and some wonderful pumpkin pie! My parents and one of my two sisters traveled from Colorado, my brother and sister-in-law came from Louisville and my husband's family traveled from Tennessee and Maryland to join us in what I believe was a wonderful day of thanks.
As any holiday goes, my thanksgiving was not without incident. I apparently cut someone off in the Kroger parking lot, unbenownst to me, and was tracked down among the flowers and told I
had been rude. I stood there stunned and on the verge of tears trying to remember how or when I had cut someone off. To her credit, it was the kindest "telling off" I had ever heard or received and she was right when she said to take time and enjoy the holidays, "it's all about family."
I came out of the store crying and made my father drive the rest of the way home while I sobbed. I pride myself on being polite, putting others first, saying a kind word or sharing a smile with a stranger, so to be told I was rude was a crushing blow to my spirit. Even so, it was a good time for introspection and focus on what is truly important during the holidays. Family. There was an additional benefit too — all the crying got my dad in the kitchen with me. We baked the pumpkin pie together — a first for us. I will forever remember my father pureeing the fresh baked pumpkin in my tiny food processor one cup at a time, making sure it was as smooth as could be. It was truly a work of art and love. The pumpkin pie was the best I've ever made and the best I've ever tasted.
Sometimes it's the troubles and struggles in life that help us come up with the best solutions. A sign on the store shelf stating there are no more cans of pumpkin and an incident at Kroger, can result in quality time spent with loved ones and a truly from-scratch, melt-in-your-mouth, mmm-this-is-so-good, pumpkin pie.
Please enjoy these photos, recipes and the Thanksgiving invitation suite I designed for our dinner this year. I will be offering this invitation suite and more in my Etsy shop this month. It is currently under construction, but I will be having an Etsy open house with plenty of freebies and discounts coming soon to a browser near you.
I hope your holidays were blessed with family, friends and a thankful heart!
"Tall Oaks Little Acorns" Invitation Suite:
This year when it was decided that we would have 15 family members in our home for Thanksgiving I decided to come up with a theme and design a suite of stationary for the occasion including invitations, menu cards, place cards, recipe cards and last but not least ... thank you cards. I hope to place these up in my new Etsy shop as freebies during our open house later this month along with other great custom stationary designs that can be printed at home, a print shop or customized for your upcoming event.
My inspiration for this design comes from our own home. We have a large Bur Oak tree that is at least 150 years old, if not older, in our front yard. It provides us with shade in the summer and a home for numerous squirrels in the winter. I've taken my love for that oak tree and the squirrels and made it a subtle decorating theme throughout our home with oak leaves, acorns, squirrels and rabbits adorning much of our decor. I decided to carry that theme on into invitations to our family thanksgiving this year, with various quotes about acorns, trees and thanksgiving on each piece.
"From little acorns mighty oaks do grow" — American Proverb
Appetizers:
• Cheese Ball and Crackers
• Olive Nut Spread
• Relish Tray
Thanksgiving Menu:
• Roasted Turkey
• Honey Glazed Ham
• Mashed Potatoes and Turkey Gravy
• Sweet Potato Casserole
• Green Bean Casserole
• Mashed Turnips with Crispy Shallots
• Fresh Buttered Corn
• Cranberry Celebration Salad
• Deviled Eggs
• Whole Wheat Dinner Rolls (fresh from a bakery in Maryland)
Dessert Menu:
• Fresh Pumpkin Pie
• Maple Molasses Pecan Pie
Caramelized Apple Spice Cake:
Another Martha Recipe I had to try! Click here for the recipe. Wonderful cake - great frosting! I did not have the time nor the energy to make the marzipan decorations with the gold luster dust, although I wanted to ... badly. I even had to have my mother make the frosting and frost the cake as I had been up all night with a sick child, so I have plans to recreate this cake at a later date and give it, it's due justice. It's a delicious recipe — just a word of warning — It takes FOREVER to make and I didn't even make the marzipan decorations. I love you Martha, but some of your recipes are are back breakers. Now that I've said that, I must say I've never made one of your cakes that I didn't like.
Maple Molasses Pecan Pie:
This is a favorite of mine! I make it every Thanksgiving. I basically take Martha Stewart's Maple Bourbon Pecan Pie and add molasses instead of bourbon. Very delicious!
Fresh Pumpkin Pie:
Due to the fact that there was absolutely NO cans of pumpkin on the store shelves this Thanksgiving, my mother and I purchased a small pie pumpkin and made this pie the old fashioned way. We roasted the pumpkin and my father scooped out the insides and pureed them in a food processor. May I say, it was well worth the effort. I am not a pumpkin pie fan. I make it because my husband is PASSIONATE about it, but I could take it or leave it. Well, I must say that I had two slices of this pie. Fantastic!
You want my recipe? Well, my favorite recipe, and I've tried others, is Libby's Pumpkin Pie recipe. Yes, the one on the back of the can. It always wins. Maybe that's why it's on the back of every can? What made this one better, sorry Libby, was the real pie pumpkin. It made this one the best!
Tuesday, November 3, 2009
Lil' Pumpkin — Cupcake Dreams & Candle Wishes: Part I
Just last month, my best friends daughter, Mollie Kate celebrated her second birthday. Little does she know it, but her mother and I have already decided that she is going to marry my two-year-old son. That way we can spend holidays together!
Rhonda e-mailed me wanting ideas and help with planning Mollie's party, so I wholeheartedly offered my services free-of-charge. Best friends always get freebies for all previous services rendered, like listening to you vent or blubber on numerous occasions. She finally settled on a pumpkin theme and we went with the tag line "Our Lil' Pumpkin". I e-mailed her quite a few ideas for cakes, favors and of course designed her invitations, which I had a blast doing. I am quite fond of pumpkins and the fall is one of my favorite seasons, so inspiration was easy to come by.
She made an adorable pumpkin shaped cake/cupcakes, had the kids paint tiny pint-sized pumpkins and handed out handmade cloth pumpkins for favors. I only have a few pictures she sent me from the party, but below you will find several ideas for this fun and festive party along with instructions for making the cloth pumpkins. There are also pictures of the invitations that she printed out from the pdf I sent her. I think they turned out well! If you would like to order these invitations from The Blu Sash we can customize a pdf for you to print out and make yourself or we can send you customized, completed versions ready for mailing. Please call 859.271.6934 or e-mail donia@theblusash.com for a quote!
Who wouldn't want to take one of these home?
Rhonda e-mailed me wanting ideas and help with planning Mollie's party, so I wholeheartedly offered my services free-of-charge. Best friends always get freebies for all previous services rendered, like listening to you vent or blubber on numerous occasions. She finally settled on a pumpkin theme and we went with the tag line "Our Lil' Pumpkin". I e-mailed her quite a few ideas for cakes, favors and of course designed her invitations, which I had a blast doing. I am quite fond of pumpkins and the fall is one of my favorite seasons, so inspiration was easy to come by.
She made an adorable pumpkin shaped cake/cupcakes, had the kids paint tiny pint-sized pumpkins and handed out handmade cloth pumpkins for favors. I only have a few pictures she sent me from the party, but below you will find several ideas for this fun and festive party along with instructions for making the cloth pumpkins. There are also pictures of the invitations that she printed out from the pdf I sent her. I think they turned out well! If you would like to order these invitations from The Blu Sash we can customize a pdf for you to print out and make yourself or we can send you customized, completed versions ready for mailing. Please call 859.271.6934 or e-mail donia@theblusash.com for a quote!
LIL' PUMPKIN: The Invitations
The invitations were four, 4.25"x 5.5" cards tied together at the top left corner with several different patterned and coordinating ribbons. The back of each card had a picture of Mollie Kate that family and friends could keep. Three of the four cards were informational and the last card had a recipe for pumpkin spice muffins. I love designing invitations that prove useful in other ways. It allows people to interact with your invitation and connect you to them in a small, but special way. With the photos and recipes hopefully these cards will be kept for some time.
Due to the distance between us and time constraints, I was unable to produce these and ship them to her with enough time for her to mail them out in a timely fashion. We decided that I would e-mail her the pdf that she could then print them out at home or a local shop and produce them herself. I think she did a great job with them as evidenced by her photos.
The final product product — Adorable!
A close up of the invitation tied up with green polka-dotted ribbon.
Cloth Pumpkin Favors:
I suggested this idea to Rhonda for favors — cloth pumpkins. A very talented and creative friend of mine once made me some cloth pumpkins as a gift and I still decorate with them every year. I had been waiting for the perfect opportunity to use these as favors and here it was. Rhonda ran with the suggestion and found some easy "how to directions" you can find below. The end product was an absolutely adorable favor that even mom would want to keep around the house!
Just a word of caution. Be sure that the age you are making these for won't potentially injure themselves with the sticks on these mini pumpkins. If you are worried about that, substitute stems made from pipe cleaners (folded in half and twisted down), floral tape or sewn cloth stems. If you have any other ideas for soft stems, please feel free to make a comment or suggestion.
Cloth Pumpkin How To
Materials needed:
• Fat quarters (purchase different prints of orange and green - one fat quarter per pumpkin)
• Dinner plate (for tracing purposes)
• Orange thread and a needle
• Poly fill
• Small sticks from a tree (or other softer stem options)
• Fabric pen or pencil
• Patterned or coordinating ribbon
1) Use your dinner plate to trace a circle on the orange patterned fat quarter.
2) Knot one end of your thread and sew a running stitch around the circle about 1/4 inch from edge, leaving your thread long so you can pull the loose end causing the fabric to pucker and pull it into a bowl-like pocket.
3) Fill the hole in the top of the pumpkin with poly fill.
4) Tighten the top of the pumpkin with the thread and knot it closed.
5) Cut simple leaves out of the green fabric or fat quarters, cutting a tiny hole in the leaf for your stick.
6) Insert the stick down into the hole on the top of the pumpkin. If you would like, you can hot glue the stick into the hole for extra security.
7) Finish it off with a cute, festive ribbon!
Who wouldn't want to take one of these home?
Lil' Pumpkin Party Ideas:
Here are some other great ideas and useful links for your Lil' Pumpkin party:
Pumpkin Patch Cupcakes:
Martha Stewart had some adorable Pumpkin Patch Cupcakes on her site. If you want to save on time substitute the candy corn pumpkins for the handmade marzipan pumpkins.
The Great Pumpkin Cake:
I love this cake! I've made it for Thanksgiving before and it's delicious! It's not that difficult either. Martha Stewart has some great ideas and delicious recipes. It could easily be decorated in a more "kid-friendly" manner and would make a great party cake. Instead of chocolate leaves you could easily make sugar cookie leaves, frosting vines and use a cinnamon stick for a stem. Try making your child's name a part of the curly vines that hang down.
Pumpkin Favor Pouches:
I stumbled across this idea when searching for favors and fell in love with them. My thought was that you could stuff the cloth pumpkin favors pictured above with candy instead of poly-fill like they do with these crepe paper pumpkins. These look fairly easy to make and I am sure kids would love them.
Pumpkin Party Games:
What is a party without games? Here are some ideas that ages 2-10 would enjoy.
• Pin the Leaf on the Pumpkin: Cut out a large pumpkin from a pattern and hang on the wall. Use a large leaf cookie cutter or other pattern to make the leaves from green tag board. Vines can be made from green curly ribbon.
• Pumpkin Bowling: Use 4 small, round pie pumpkins you can find at the grocery or local farmers market as the bowling balls. Then collect 10 empty 2-liters, 1/2 filled with water for use as the bowling pins.
• Pumpkin Ring Toss: Choose several pumpkins with large, straight stems in various sizes (large and small) and purchase a set of rings for tossing around the stems.
• Pumpkin Painting: Purchase a mini-pumpkin for each guest and provide paint and brushes for each guest to decorate their own pumpkin. You might think about a washable paint or making sure this activity is done outside or on a well-protected surface.
• Pumpkin Mini-Golf: Carve several golf "holes" from various sizes and shapes of pumpkins. Be creative and you can have a delightful pumpkin mini-golf course for the kids to enjoy. Purchase some small plastic clubs and they will have a blast.
Here's to a great party for your lil' pumpkin!
Cupcake Dreams and Candle Wishes
Ever since my daughter was born I have been mad about Birthday's. I think it was remembering the amazing cakes my mother would make for each birthday and how special they made me feel, that got me really excited about birthdays. I remember thinking how wonderfully talented my mother was when she replicated the cover of my Little Golden Cinderella book on the front of my "princess party" cake. All the little girls showed up in long dresses. We decorated crowns with sequins and played pin the slipper on Cinderella, (which my mother had hand drawn and cut out). She was a great artist in my eyes and I don't think she knows how loved those parties always made me feel.
Now, I am so utterly crazy about birthdays that I start planning the next one as soon as I finish the current one. It's not that I feel I have to one-up anyone, including myself, it's just that I LOVE, absolutely LOVE, parties! I am passionate about them. They really get my creative juices flowing. I love sweets. I love cakes. I love balloons. I love to watch the shear joy on children's faces at a party. Birthday parties are full of a happiness that always gets me dreaming and doodling about the next one. Yes, I do wear myself out planning, preparing and creating for each birthday, but it's worth it when my daughter's eyes open wide and a smile spreads across her face upon seeing her cake. When my son saw his cupcakes this year he shouted "Oooohhhh, I love it!" in his angelic two year old voice. My heart melted. That's what it's all about!
It has been worth every second to share those moments with my children. I hope they will feel as special as my mother made me feel. For that reason, I thought I'd share my complete party ideas and plans with you for each party in a six part series called Cupcake Dreams & Candle Wishes.
Some of my ideas are my own, some are inspired by others and many are taken from the pages of a Martha Stewart magazine (who can resist a "good thing"?). I hope I can provide you with some inspiration for your next great Birthday party with photos, links, recipes and patterns. Here's to cupcake dreams and candle wishes!
Now, I am so utterly crazy about birthdays that I start planning the next one as soon as I finish the current one. It's not that I feel I have to one-up anyone, including myself, it's just that I LOVE, absolutely LOVE, parties! I am passionate about them. They really get my creative juices flowing. I love sweets. I love cakes. I love balloons. I love to watch the shear joy on children's faces at a party. Birthday parties are full of a happiness that always gets me dreaming and doodling about the next one. Yes, I do wear myself out planning, preparing and creating for each birthday, but it's worth it when my daughter's eyes open wide and a smile spreads across her face upon seeing her cake. When my son saw his cupcakes this year he shouted "Oooohhhh, I love it!" in his angelic two year old voice. My heart melted. That's what it's all about!
It has been worth every second to share those moments with my children. I hope they will feel as special as my mother made me feel. For that reason, I thought I'd share my complete party ideas and plans with you for each party in a six part series called Cupcake Dreams & Candle Wishes.
Some of my ideas are my own, some are inspired by others and many are taken from the pages of a Martha Stewart magazine (who can resist a "good thing"?). I hope I can provide you with some inspiration for your next great Birthday party with photos, links, recipes and patterns. Here's to cupcake dreams and candle wishes!
Thursday, October 22, 2009
MY FAVORITE THINGS
This is the debut posting for The Blu Sash's blog, My Favorite Things! I hope to post many exciting tips and ideas for your wedding favors, gift ideas for your bridesmaids, neat ideas for your child's next birthday party or just something I found online that I absolutely love. Think of this blog as my sketch pad for the many creative ideas that float through my mind and I never get to use. Hopefully you will find the opportunity to create!
I'm old fashioned. I like a personal note on a piece of paper. I can touch and feel it. Carry it with me. Re-read it. I love having people into my home. Feeding those I love brings me great joy. There is an intimacy and a close friendship that grows out of these moments spent with friends and family inside the warm walls of our home. I love making something unique for someone. Something that reflects who they are and what they mean to me. Making something by hand makes me a participant in that special place in time. I love knowing that the Dorthy dress my daughter is wearing for Hall-o-ween was made by her grandmother and myself. Every time I see her wearing it I smile and think of that Saturday we spent sewing it and how much she's loved it. I love the look of awe and excitement in my children's eyes when they first see the cake I've made for their birthday. These are all the reasons I do what I do. It's what inspires me to create and to dream.
I start this blog in the hopes that you will see the joy in someones eyes when they unwrap a gift, bite into a cookie, blow out their candles, say their vows or read that special card. It's about what's important in life — LOVE!
Subscribe to:
Posts (Atom)